Stable commitment to every leap, customized every flat
Blog


Suning County, Cangzhou City, Hebei Province, China
15100291481
dxfloor144@gmail.com

Stable commitment to every leap, customized every flat
Blog
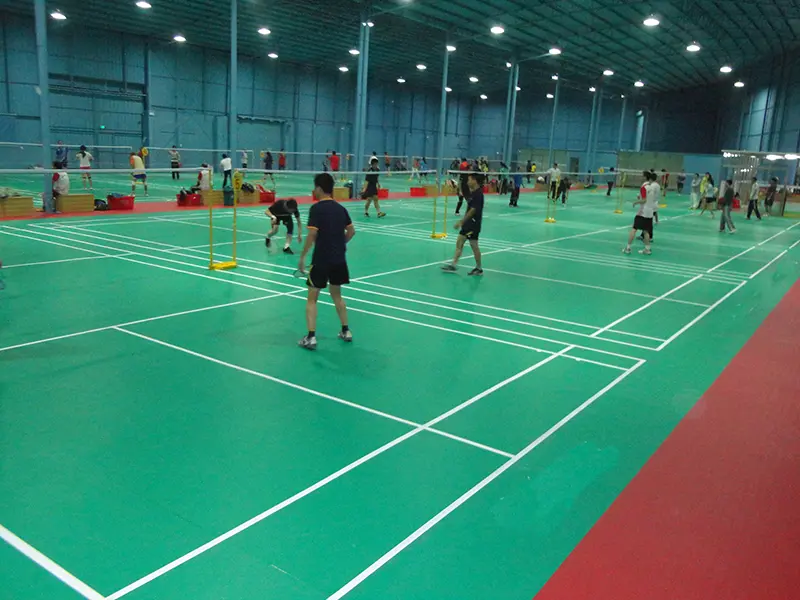
The quality of badminton flooring installation directly impacts its performance and helps prevent issues like warping, hollow spots, and seam cracking. Depending on the application (professional tournament venues, school/community recreational areas, temporary tournament venues), PVC badminton flooring primarily uses two installation methods: adhesive bonding and convenient (removable). These correspond to ordinary flooring materials and durable badminton flooring. There's also wood flooring, which is typically installed in multiple layers starting from the bottom.
Materials: Water-based environmentally friendly PVC adhesive (to avoid formaldehyde release), welding wire (same material as the flooring, used for heat welding seams), welding gun, scraper; special repair agent (for minor scratches).
Tools: Utility knife, hook knife;
The ambient temperature for installation should be between 15-30℃, and the relative humidity between 40%-60%. Low temperatures can cause the flooring to become brittle, and high temperatures can cause the adhesive to fail.
The installation area must be cleared of all debris. Doors and windows should be closed to reduce dust and prevent contamination from other construction work (such as painting or cement work).
For cement concrete floors, use a floor grinder to remove loose sand, protrusions, and oil stains from the surface, paying particular attention to cleaning cracks and pits.
Cracks ≤2mm should be filled with epoxy mortar. Cracks >2mm require cutting V-grooves and filling with sealant. Pits should be leveled with self-leveling cement.
Use a laser level to mark the center line and boundary lines of the badminton court (singles 13.4m × 5.18m, doubles 13.4m × 6.1m), ensuring the lines are vertical and accurate.
Install the PVC flooring along the center line. Unroll the roll flooring and cut it to the dimensions of the space, leaving a 5-10cm allowance (for fine-tuning the edges). Use a hook knife and a straight steel ruler to cut the flooring, keeping the blade perpendicular to avoid beveled edges (which will affect the seam adhesion).
Small Areas/Recreational Areas: Use a "strip application" method, applying the adhesive in strips (10cm spacing) to the base layer with a notched trowel. This saves adhesive and facilitates air release.
Large Areas/Professional Venues: Use a "full coating" method, applying the adhesive evenly to a thickness of approximately 0.3-0.5mm, ensuring no areas are missed.
Wait 10-20 minutes after applying the adhesive until it is no longer sticky to the touch (it should be slightly tacky but not stringy to the touch). This is the optimal time for bonding.
Starting from one end of the site, slowly adhere the PVC flooring to the subfloor, using a 60kg rubber roller to press it outwards and remove air bubbles to prevent hollow spots. When reaching the corners, gently tap the flooring with a rubber mallet to ensure a tight fit with the wall/post, leaving a 5-8mm expansion joint (to accommodate temperature changes). Align the seams between two floorboards, ensuring a gap of ≤0.5mm. Use the roller to repeatedly press the seam to ensure a firm bond.
Welding should only be performed 24 hours after the flooring is laid and the adhesive is fully cured.
Use a grooving tool to cut a V-groove along the joint, to a depth of 2/3 of the flooring thickness (e.g., 4mm for a 6mm thick flooring). Clean the groove of any dust.
Insert the welding wire into the groove and weld at a constant speed using a hot air welding gun (temperature set to 350-400℃), maintaining a gun movement speed of 0.5-1m/minute to ensure the welding wire is fused with the flooring.
After the weld has cooled (approximately 10 minutes), use a scraper to smooth out any excess welding wire, ensuring the joint is flush with the flooring surface (no protrusions to avoid affecting player movement).
As a professional manufacturer of badminton court rolls, our badminton court lines are pre-marked, so this step can be skipped if you choose our PVC flooring.
After installation, adhesive-backed flooring needs to be left to stand for 48 hours, during which time walking and heavy objects should be avoided. Click-lock flooring can be used immediately after installation, but strenuous activity should be avoided for 24 hours.
Using a 3-meter straightedge, the surface gaps of the flooring should be ≤2mm, with no protrusions or hollow spots.
Adhesive-backed flooring welds should be smooth and free of cracks; click-locked flooring joint gaps should be ≤0.3mm.
Ball rebound rate ≥80% (using a standard badminton shuttlecock dropped from a height of 1m, rebound height ≥0.8m), anti-slip coefficient ≥0.65 (in both dry and wet conditions).
Hollow Flooring: Often caused by uneven glue application or insufficient drying time. The hollow area needs to be cut open, glue reapplied, and the air removed using a pressure roller.
Cracked Joints: For glued flooring, this may be due to incomplete welding; re-grooving and welding are required. For click-lock flooring, the locks may not be tightly engaged; tighten them with a rubber mallet or replace the module.
Warped Flooring Edges: Caused by excessive moisture content in the base layer or insufficient expansion joints. The warped edge needs to be cut open, the base layer dried, and the flooring re-attached, with additional expansion joints provided.
Misaligned Court Lines: Caused by failure to use a laser level during line laying. The lines need to be re-laid and the flooring position adjusted (for glued flooring, partial re-installation is required).
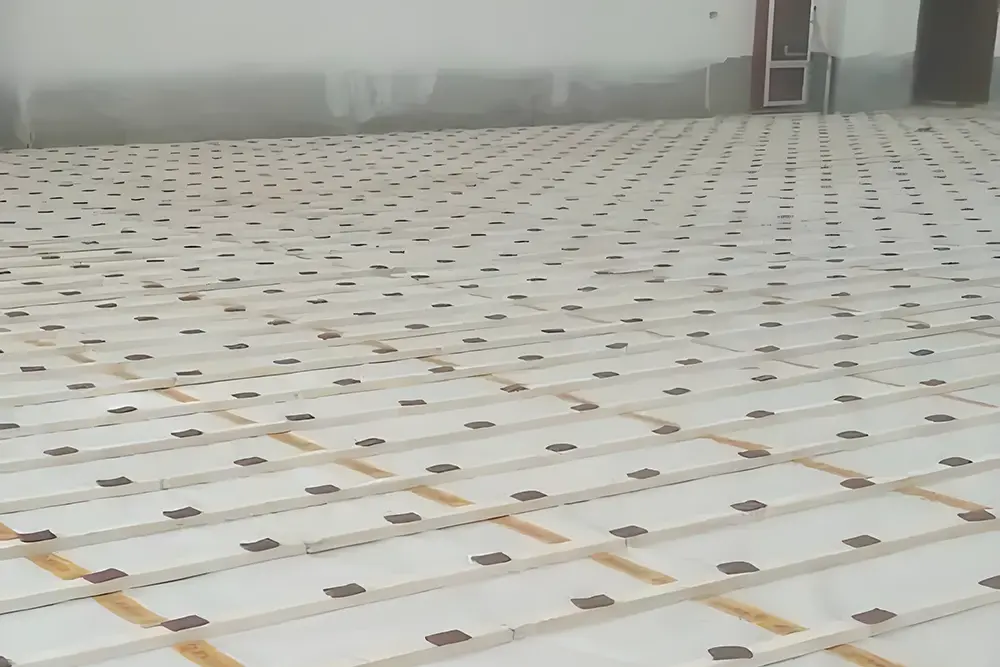
The joist system is the "soul" of badminton wooden flooring. It is divided into single-layer joists (for recreational/training courts) and double-layer joists (for professional tournament venues). The latter, through the superposition of "main joists + secondary joists," improves shock absorption and elasticity, better meeting the needs of professional badminton.
Use a laser level to mark the keel laying lines at 400mm intervals (badminton courts require denser keels to ensure even stress distribution). Simultaneously, mark the center line and boundary lines of the badminton court, ensuring the keel is parallel to the court lines.
Place shock-absorbing pads: Place a 10mm thick rubber shock-absorbing pad every 500mm along the keel line. The pads must match the keel dimensions to avoid misalignment.
Fix the keel: Place the solid wood keel on the shock-absorbing pads, drill holes with an impact drill, insert anti-corrosion wooden wedges, and then fix the keel to the base layer with expansion screws (the spacing between fixing points for each keel should be ≤800mm).
Use a level to adjust the keel's level; the height difference should be ≤2mm/2m. Use wooden shims to adjust areas that are too low.
Keel anti-corrosion: Apply a coat of anti-corrosion paint to the keel surface, especially at cut edges, to prevent moisture and rot.
Main Keel Installation: Fix the main keel following the single-layer keel installation steps (600mm spacing). Use 50×70mm thickened solid wood for the main keel to enhance load-bearing capacity.
Secondary Keel Construction: Vertically lay secondary keels (40×60mm) above the main keel, spaced 400mm apart. Secure the secondary keels to the main keel using wood glue and screws, forming a "well" shaped structure.
Shock Absorption Enhancement: Insert rubber shock-absorbing pads between the main and secondary keels, or attach polyester fiber pads under the secondary keels to further improve impact absorption performance (must meet the BWF requirement of 20-30% impact absorption rate).
Leveling Acceptance: Use a 3-meter straightedge to check the flatness of the secondary keel surface; the error should be ≤1mm/2m, ensuring no height difference after panel installation.
For professional sports venues, light steel keels (galvanized steel, corrosion-resistant) can be used. They are fixed to the base layer with rivets, spaced 400mm apart, and padded with rubber shock-absorbing pads underneath. Light steel keels require no anti-corrosion treatment and are less prone to deformation, making them suitable for areas with high humidity fluctuations, but the construction cost is higher than solid wood keels.
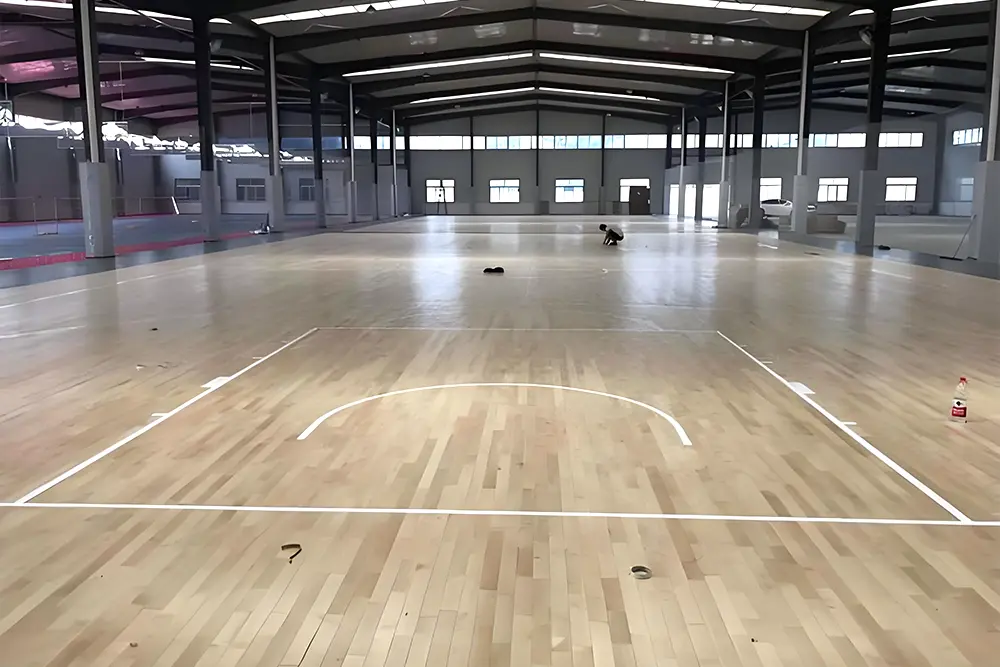
Determine the laying direction: The flooring grain should be parallel to the long side of the badminton court (the direction players run) to reduce foot resistance.
Pre-layout layout: Pre-lay the panels from the center line of the court outwards, adjusting the spacing between the panels to ensure even edge cutting and avoiding narrow strips of panels in conspicuous positions.
Starting from one corner of the site, firmly attach the floorboards to the joists. Use flooring-specific twisted nails (2.5 times the thickness of the floorboards) to diagonally drive the nails into the joists from the side of the board (≥2 fixing points per board). The nails should be driven 2-3mm into the board to avoid protrusion.
The second row of boards should be staggered with the first row (staggered joint length ≥300mm) to avoid continuous seams that could cause the floorboards to loosen. Apply wood glue to the joints to enhance sealing; the gap should be ≤0.5mm.
Leave an 8-10mm expansion joint around the perimeter of the site (to accommodate thermal expansion and contraction of the wood). Fill the expansion joint with foam strips to prevent debris from entering.
When encountering columns or walls, measure the dimensions with a tape measure and precisely cut the boards with a miter saw. After cutting, sand the edges smooth before fixing them to the joists.
Composite sports wood flooring mostly uses a click-lock design, requiring no nails. Simply align the panels with the click locks and lay them on the joists. When splicing, gently tap the edges of the panels with a rubber mallet to ensure the click locks are tightly engaged. Leave a 2mm expansion joint at the end of each row of panels. The remaining steps are the same as for solid wood flooring.
Use an 80-grit floor sander to sand along the grain of the wood, removing burrs and unevenness to reveal the natural wood color.
Fine sanding: Switch to 120-grit sandpaper to eliminate coarse sanding marks and create a smoother surface.
High-precision sanding: Use a 240-grit edge sander to sand corners, columns, and other hard-to-reach areas, then use a full-surface sander to ensure a surface flatness ≤1mm/2m.
Apply 1-2 coats of a sports floor-specific sealing primer to penetrate the wood pores and prevent peeling later. Each primer coat should dry for at least 12 hours.
If color adjustment is needed, apply one coat of color paint. After drying, lightly sand with 400-grit sandpaper to remove surface particles.
Apply 2-3 coats of a two-component polyurethane anti-slip topcoat (BWF certified). The topcoat should be applied thinly and evenly, with each coat drying for at least 24 hours. Hours; After the final coat of paint dries, allow it to stand for 72 hours to fully cure.
Use a laser level to mark the badminton court lines (13.4m x 6.1m for doubles, 13.4m x 5.18m for singles), with a line width of 4cm, ensuring the lines are straight and symmetrical.
Apply masking tape along the lines, ensuring it adheres tightly to the ground to prevent paint penetration.
Apply two coats of badminton court-specific wear-resistant paint (white or a color contrasting strongly with the floor) to the lines, lightly sanding the surface after each coat to ensure clear and durable lines.
Remove the masking tape when the paint is semi-dry (approximately 2 hours) to prevent paint peeling.
After the lines are completely dry, allow them to stand for another 24 hours, during which time walking on them is prohibited.
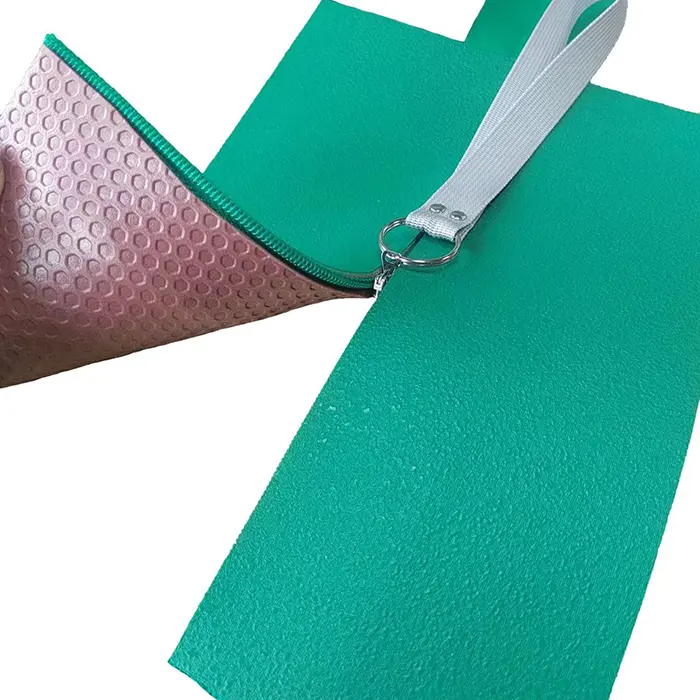
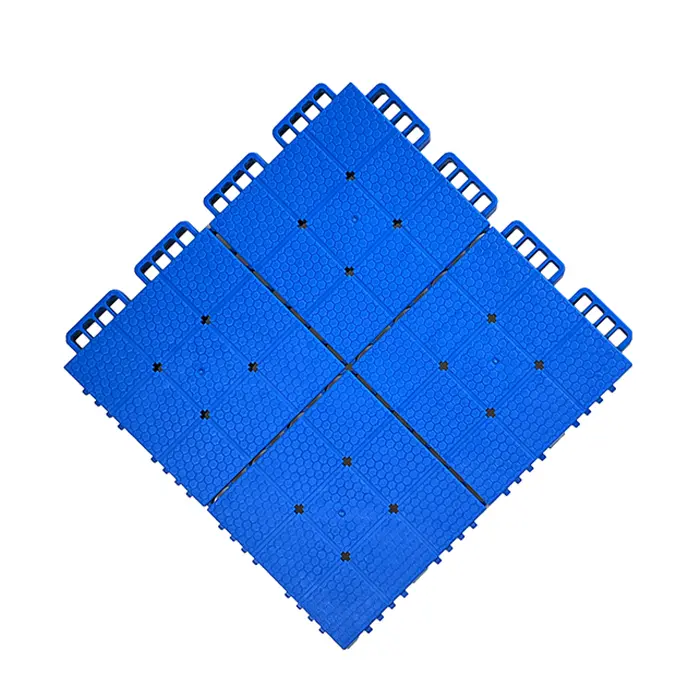
Convenient installation options include roll out badminton floor with zipper and Velcro types, allowing for quick installation and removal, and flexible court changes. Below is an example of Velcro badminton floor installation:
For detailed installation steps and methods on actual courts, please request a installation video! We welcome you to choose our badminton court flooring materials.

Leave Your Message
Message us for free samples and quotes!