Stable commitment to every leap, customized every flat
Blog


Suning County, Cangzhou City, Hebei Province, China
15100291481
dxfloor144@gmail.com
Stable commitment to every leap, customized every flat
Blog
The installation of indoor PVC vinyl sports flooring is typically handled by the manufacturer, who will provide you with a complete flooring system tailored to your venue's requirements, including pre-marked court lines on the PVC flooring. However, there may be instances where on-site installation is required.
Installation generally falls into two categories:
Movable Installation: The flooring rolls are bonded together using special connecting strips provided by the sports floor manufacturer. The flooring is not bonded to the floor surface, allowing the PVC flooring mats to be easily rolled up or moved, making it convenient for relocation.
Fixed Installation: Adhesive is applied to the entire surface of the floor to be installed.
Mobile installation is simpler, such as using zipper or Velcro sports flooring, which is convenient for moving and changing venues. The following primarily introduces the fixed installation method.
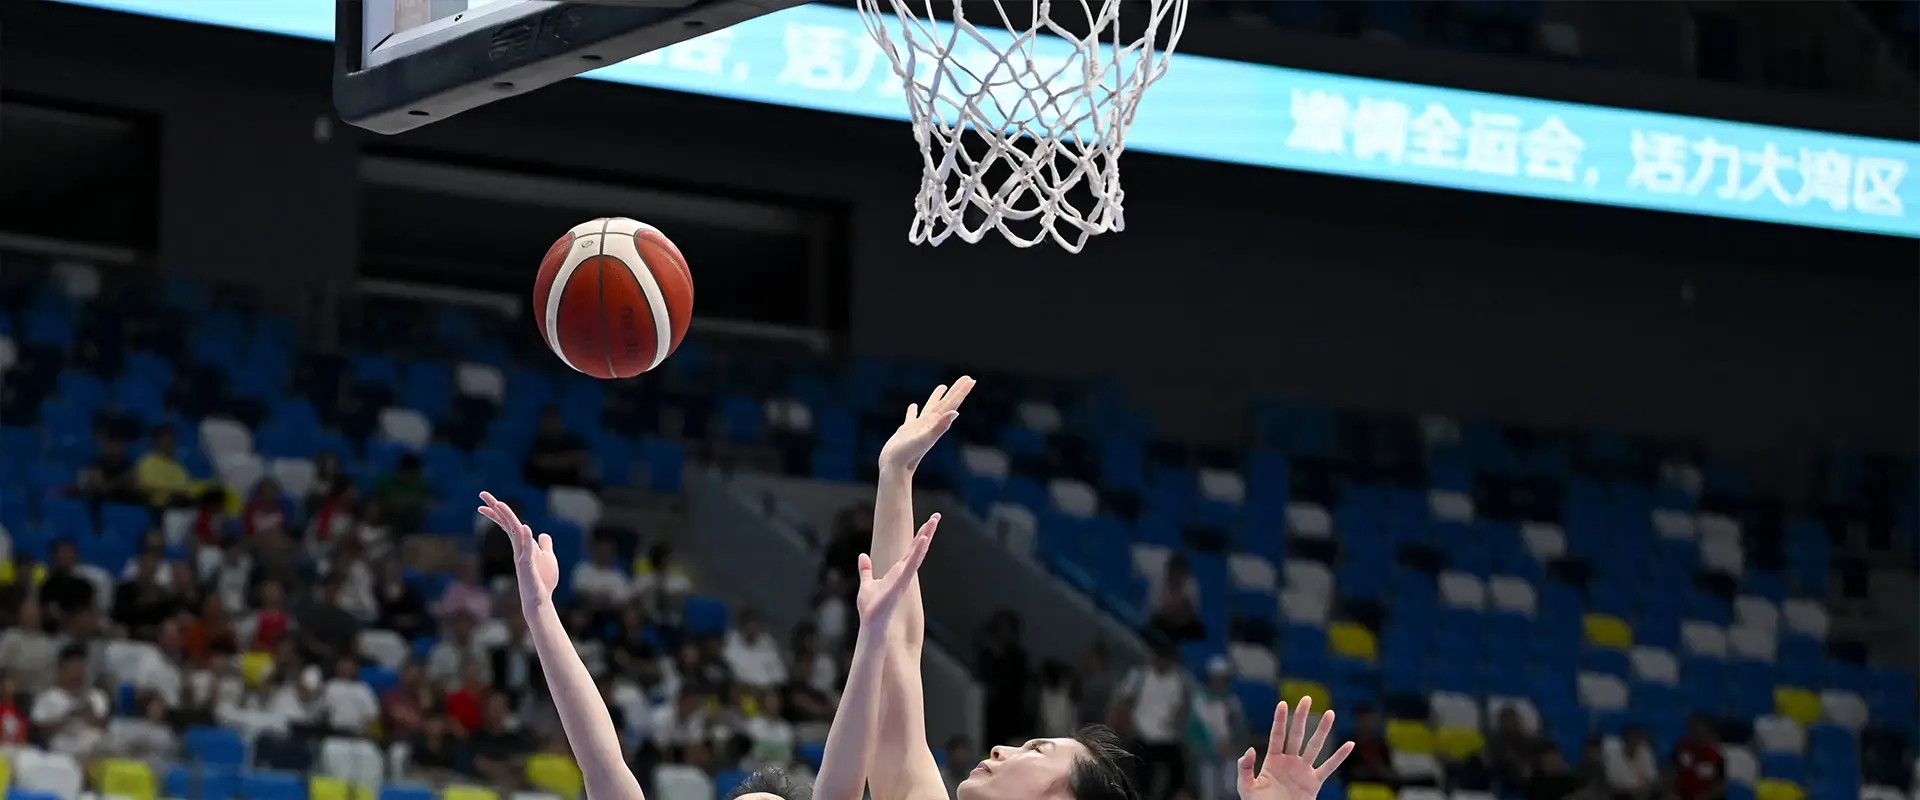
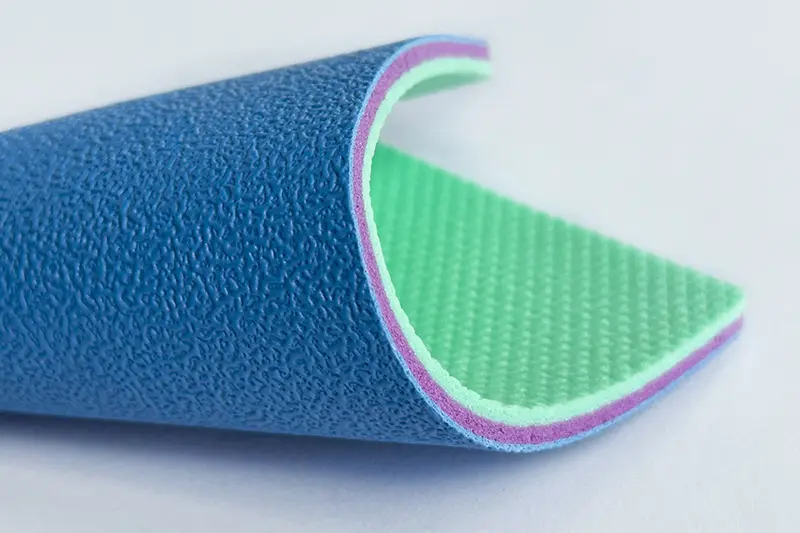
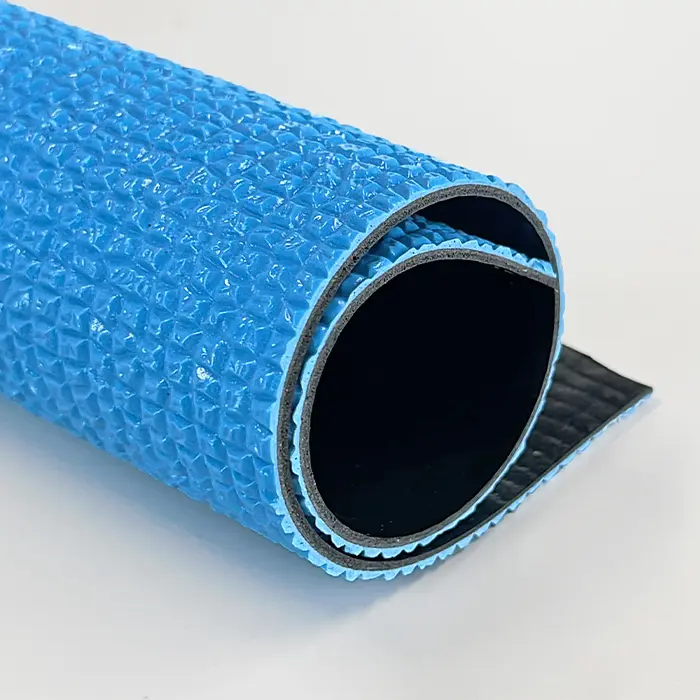
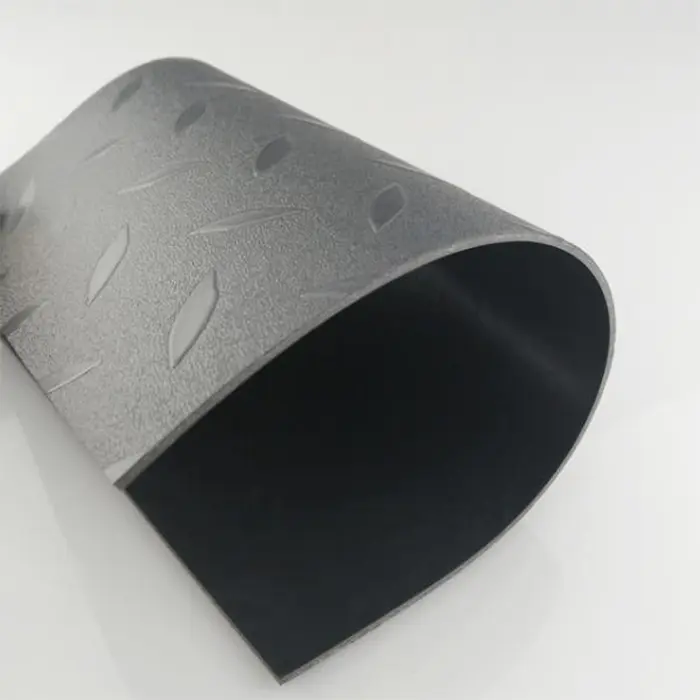
PVC Sports Flooring: Select professional-grade roll materials based on venue requirements (e.g., badminton or basketball court flooring require shock-absorbing and anti-slip properties, with a typical thickness of 4-6mm). Confirm the model, colour, and quantity (calculate based on venue area plus 5% material loss).
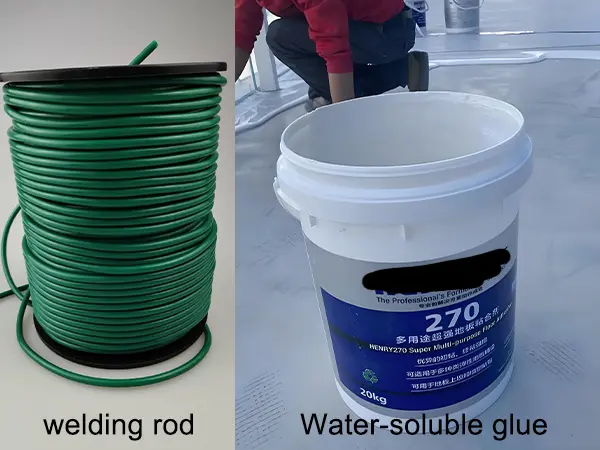
Specialised floor adhesive (water-based or solvent-based, must be compatible with PVC material; water-based adhesive is recommended for sports venues due to its higher environmental friendliness);
Welding wire (same material and colour as the flooring, diameter 3-4mm, sports venues require high tensile strength);
Edge trim (aluminium alloy or PVC material, used for wall corners, doorways, and other edge finishes);
Primer (to enhance adhesion during substrate preparation), self-levelling cement (if the substrate is uneven).
Measuring tools: steel tape measure, laser line projector (to ensure the venue is square);
Cutting tools: special utility knife, ruler, utility knife (for cutting rolls), compass (for cutting curved corners);
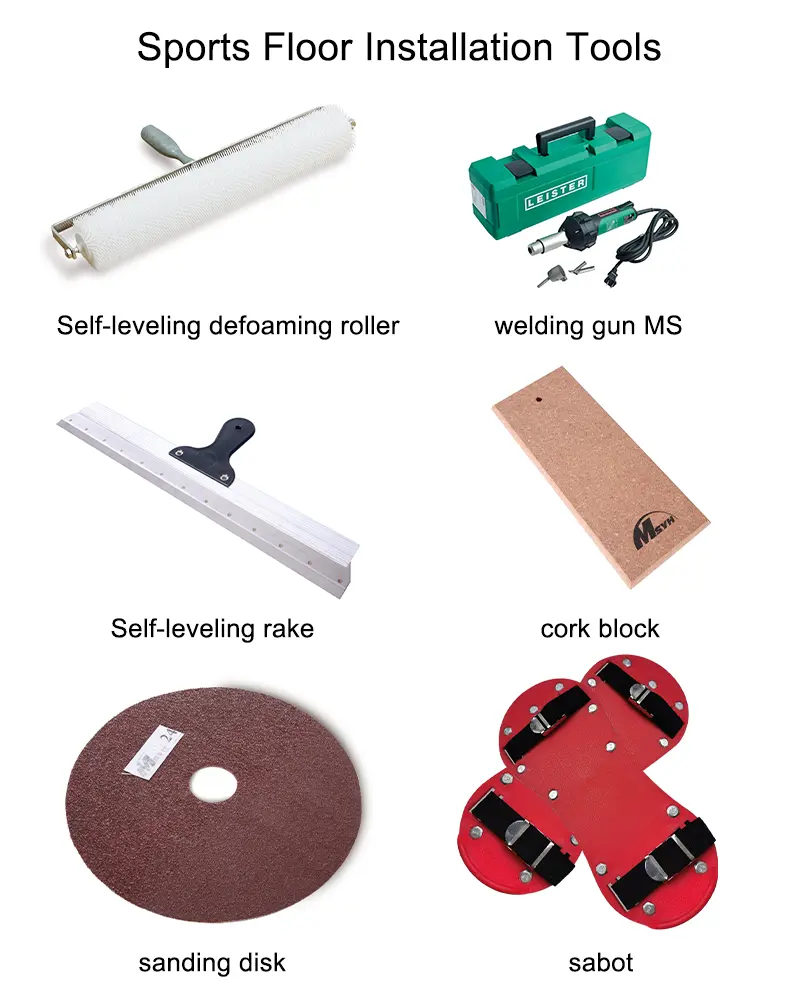
Adhesive application tools: toothed scraper (select 6-10mm tooth depth based on adhesive volume), roller;
Welding tools: heat gun (temperature adjustable, recommended setting 350-450°C), welding rod roller, scraper (for smoothing welded lines);
Compaction tools: heavy roller (50-100kg, for compaction after installation), rubber hammer;
Cleaning tools: vacuum cleaner, cloth, specialised cleaner.
Base layer requirements:
Flatness: Check with a 2m straightedge, with an error of ≤2mm; any deviations must be levelled with self-levelling cement;
Strength: The base layer surface must have no sanding or hollows, with compressive strength ≥ C20;
Moisture content: Concrete base layer ≤ 8%, cement mortar base layer ≤ 6% (can be tested with a moisture content tester);
Cleanliness: No dust, oil stains, paint, or other impurities; apply a primer coat with an interface agent if necessary.
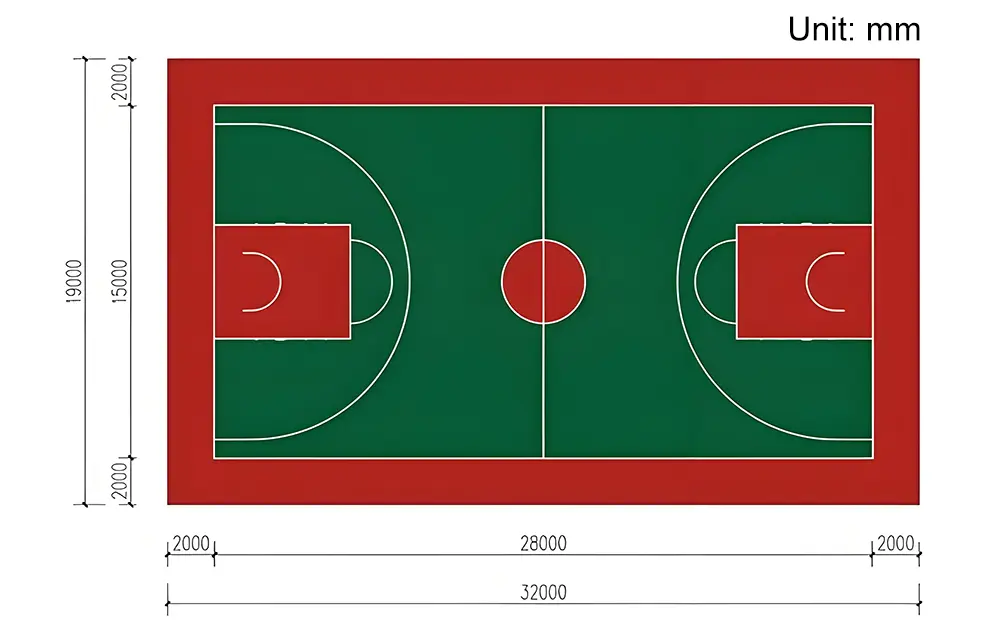
Based on the venue's function (e.g., basketball court, badminton court), mark reference lines to determine the floor laying direction (typically parallel to the venue's long side). Use a laser line projector to ensure vertical alignment of longitudinal and transverse lines (error ≤ 1 mm/m).
Mark the positions of columns, pipes, and other obstacles, plan the cutting path to avoid small edges or strips (edge width ≥ 100 mm).
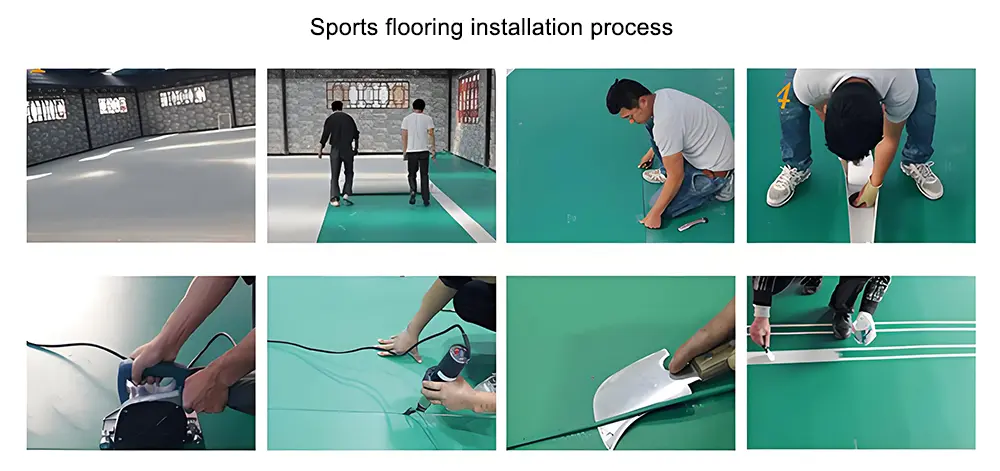
Pre-laying treatment: Unroll and lay flat on the installation surface for more than 24 hours to acclimate to indoor temperature (15–25°C) and humidity (40–60%), reducing shrinkage and deformation after installation. After the flooring has acclimated, leave an extra 5cm at both ends when cutting. Before adhesive application, roll up approximately half of the unfolded flooring in the opposite direction, then apply adhesive using a notched trowel—starting from the centre—with a toothed scraper.
Precise cutting:
Mark the cutting lines on the back of the roll material according to the laid-out dimensions, then use a ruler and utility knife to cut along the marked lines; the cuts must be straight (error ≤ 1 mm);
For curved corners or curved areas, mark with a compass or template before cutting carefully;
Leave a 5–10 mm overlap at the joints between adjacent rolls to facilitate subsequent alignment and cutting.
Notes: When cutting, the roll material must be laid flat to avoid stretching and deformation; the edges after cutting must be free of burrs; if not, lightly sand them with sandpaper.
Adhesive mixing: Dilute the water-based adhesive according to the instructions (typically add 10%-15% water and mix thoroughly); for solvent-based adhesives, confirm the curing time.
Adhesive Application Method:
Use a notched trowel to evenly apply the adhesive to the substrate, holding the trowel at a 45° angle to the ground to ensure even adhesive distribution (standard application rate: 200–300 g/m², adjust based on substrate flatness);
Apply adhesive in sections (no more than one roll area at a time) to prevent uneven drying;
Adhesive drying time: Water-based adhesives require approximately 15–30 minutes (touch-dry but slightly tacky), while solvent-based adhesives require approximately 30–60 minutes (confirm the optimal bonding time according to the product instructions).
Positioning: Start from the centre reference line of the site, align the roll with the line, and have two people work together to unfold it from the centre outward to avoid wrinkles;
Bubble removal: During installation, gently tap the surface with a rubber hammer or use a heavy roller to repeatedly press from the centre to the edges (pressure ≥50kg) to expel air between the substrate and the flooring;
Seam Treatment: Align the edges of adjacent rolls with an error of ≤1mm. If there is a height difference, adjust the position of the roll. Use a straightedge to secure the overlapping area, cut along the straightedge to separate the two layers of roll material, and remove the waste to form a neat seam.
After installation, allow the floor to rest for 24 hours to ensure the adhesive has fully cured (at 20°C, water-based adhesive cures in approximately 24 hours, while solvent-based adhesive takes about 48 hours) to prevent floor shifting during welding.
Adjust the welding gun temperature: Set according to the thickness of the PVC flooring (approximately 380–420°C for 4 mm thick flooring, approximately 400–450°C for 6 mm thick flooring), and test weld with scrap material to confirm the optimal temperature;
Inspect the welding rod: Ensure the diameter matches the flooring seam and the surface is free of oil and moisture.
Welding gun and rod angle: The welding gun nozzle should be at a 60°-70° angle to the floor, with the rod vertically pressed into the seam. The nozzle should be 10-15mm from the seam, moving at a constant speed (approximately 1.5-2m/min);
Rod filling: Ensure the rod is fully melted and fills the seam. Apply slight pressure to the rod during welding to prevent voids;
Joint treatment: When long-distance welding requires segmentation, adjacent welds should overlap by 10–15 mm to ensure a secure connection.
After welding is complete, allow the weld line to cool for 5–10 minutes (until it is no longer hot to the touch), then use a special scraper to remove excess welding rod along the joint at a 45° angle, smoothing the surface (error ≤ 0.5 mm);
Inspect the welded joint: The surface should be smooth with no burrs, no incomplete welds or missed welds, and no cracks at the seam.
Wall corner treatment: Leave an 8-10mm expansion joint between the pvc sports flooring edge and the wall, secure with an aluminium alloy edge trim strip (screw spacing ≤300mm), and seal the gap between the trim strip and the floor with transparent silicone sealant;
Doorway treatment: Install special PVC threshold strips or aluminium alloy pressure strips to ensure a smooth transition between the floor and adjacent surfaces. Secure the pressure strips with adhesive or screws.
When encountering columns or pipes, cut the floor according to the contour, use a small round knife to create a rounded edge, and secure the edge tightly against the obstacle using edge trim or silicone sealant to prevent water or dust from seeping in.
Use a vacuum cleaner to remove surface dust, then wipe with a wrung-out damp cloth; avoid direct water rinsing;
If adhesive or weld residue remains, use a special cleaner (PVC floor neutral cleaner) with a soft cloth to wipe; do not use strong acid or alkali solvents.
Appearance: The floor surface should have no wrinkles or bubbles, the joints should be flat, the weld lines should be smooth, and the colour should be uniform with no colour differences;
Functionality: When stepped on, there should be no noticeable indentations, and the shock absorption effect should meet standards when jumping (sports floor elasticity test: ball rebound rate ≥90%);
Joint strength: The weld lines should not crack when pulled by hand, and the height difference at the joints should be ≤0.3mm;
Environmental friendliness: Formaldehyde emission within 24 hours after installation ≤0.1 mg/m³ (complies with GB 18586-2017 standard).
Maintenance of sports flooring is equally important. Proper maintenance can extend its service life. Specific maintenance procedures can be referenced as follows: PVC Sports Flooring Maintenance and Care

Leave Your Message
Message us for free samples and quotes!